Trên Play Store có những ứng dụng kỳ quái, vô lý như chụp ảnh ma
quỷ. Trong những ứng dụng này, bạn chụp ảnh bất cứ cái gì đều sẽ có một ảnh ma
quỷ mờ hoặc rõ đứng ngồi ngả nghiêng xen vào trong ảnh.
Điện thoại di động không thể làm được những việc như vậy. Nhưng
chúng có tác dụng giải trí, đùa vui với bạn bè hoặc trẻ em.
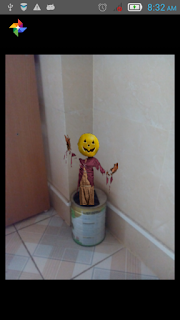
Ta sẽ làm một ứng dụng kiểu như vậy, chụp ảnh và có hình một nhân
vật kỳ quặc xen vào trước ảnh.
Đây là nhân vật kỳ quặc để làm ví dụ.
Tạo một project có tên bất kỳ, trong file xml của class
MainActivity ta để một FrameLayout có 2 imageView chồng lên nhau, ở dưới có 2
nút bấm.
<?xml version="1.0"
encoding="utf-8"?>
<LinearLayout xmlns:android="http://schemas.android.com/apk/res/android"
android:layout_width="match_parent"
android:layout_height="match_parent"
android:orientation="vertical" >
<FrameLayout
android:layout_width="match_parent"
android:layout_height="wrap_content"
android:id="@+id/l" >
<ImageView
android:id="@+id/image"
android:layout_width="match_parent"
android:layout_height="400dp"
android:scaleType="fitCenter"
/>
<ImageView
android:id="@+id/image2"
android:layout_width="100dp"
android:layout_height="138dp"
android:layout_marginBottom="1dp"
android:layout_gravity="center"
android:contentDescription="@null"
/>
</FrameLayout>
<LinearLayout
android:layout_width="wrap_content"
android:layout_height="wrap_content"
android:layout_gravity="center_horizontal"
android:layout_marginTop="20dp"
>
<Button
android:id="@+id/bu1"
android:layout_width="80dp"
android:layout_height="40dp"
android:background="@drawable/back2"
android:text="Chụp ảnh"
android:textColor="#0000cd"
android:textSize="2mm"
/>
<Button
android:id="@+id/bu2"
android:layout_width="80dp"
android:layout_height="40dp"
android:layout_marginLeft="4dp"
android:background="@drawable/back2"
android:text="Lưu ảnh"
android:textColor="#0000cd"
android:textSize="14sp"
/>
</LinearLayout>
</LinearLayout>
File back2.xml để làm nút bấm bo tròn như sau.
<?xml version="1.0"
encoding="utf-8"?>
<selector xmlns:android="http://schemas.android.com/apk/res/android"
>
<item android:state_pressed="true"
>
<shape android:shape="rectangle" >
<corners android:radius="20dip"
/>
<stroke android:width="0.5dip"
android:color="#6699cc" />
<gradient android:angle="-90"
android:startColor="#66ff00" android:endColor="#bcd4e6" />
</shape>
</item>
<item android:state_focused="true">
<shape
android:shape="rectangle" >
<corners
android:radius="20dip" />
<stroke android:width="0.5dip"
android:color="#6699cc" />
<solid android:color="#afeeee"/>
</shape>
</item>
<item >
<shape
android:shape="rectangle" >
<corners
android:radius="20dip" />
<stroke
android:width="0.5dip" android:color="#6699cc"
/>
<gradient android:angle="-90"
android:startColor="#E6E6FA" android:endColor="#e6e8fa"
/>
</shape>
</item>
</selector>
Trong class Main, khai báo imageView, nút bấm, layout, một file
lưu ảnh.
Button b1,b2;
ImageView im,im2;
File des;
FrameLayout layout;
Tham chiếu địa chỉ, tạo đường dẫn để lưu ảnh tạm.
b1 =
(Button)findViewById(R.id.bu1);
b2 =
(Button)findViewById(R.id.bu2);
layout =
(FrameLayout)findViewById(R.id.l);
im =
(ImageView)findViewById(R.id.image);
im2 =
(ImageView)findViewById(R.id.image2);
des = new
File(Environment
.getExternalStorageDirectory(),
"image.jpg");
Trong nút chụp ảnh ta bật camera sau lên và startActivityForResult để chờ cái ảnh chụp về.
try {
Intent intent = new Intent(MediaStore.ACTION_IMAGE_CAPTURE);
intent.putExtra(MediaStore.EXTRA_OUTPUT,
Uri.fromFile(des));
startActivityForResult(intent,
1);
} catch
(ActivityNotFoundException e) {
//Handle if no application
exists
}
Trong hàm Override ta nhận về cái ảnh, set nó vào imageView ở dưới,
ở trên ta set cái ảnh ma là xong.
Copy lên trên ngoặc đóng cuối cùng.
@Override
protected void
onActivityResult(int requestCode,
int resultCode,
Intent data) {
if(requestCode == 1
&& resultCode ==
Activity.RESULT_OK) {
try {
FileInputStream in =
new
FileInputStream(des);
BitmapFactory.Options options =
new
BitmapFactory.Options();
options.inSampleSize = 10;
Bitmap userImage = BitmapFactory
.decodeStream(in,
null, options);
im.setImageBitmap(userImage);
im2.setBackgroundResource(R.drawable.ma);
} catch (Exception e) {
e.printStackTrace();
}
}
}
Bây giờ để lưu ảnh, ta tạo một class tên là lưu, khai báo vào
trong Androidmanifest.
Ta cho bàn phím hiện ra luôn, để class nổi giống Dialog.
Trong class lưu, khai báo EditText, nút bấm, tại nút bấm OK ta set
lệnh kiểm tra nếu chưa nhập gì thì nhắc, nhập rồi ta trả lại chuỗi tên ảnh về
class Main.
String ten = e.getText().toString();
if (ten == null ||
ten.trim().equals("")) {
Toast.makeText(luu.this, "Bạn chưa
nhập tên",
Toast.LENGTH_SHORT).show();
}
else {
chi = ten;
Intent
in = getIntent();
Bundle
bun = new Bundle();
bun.putString("iz", chi);
in.putExtras(bun);
setResult(4,
in);
finish();
}
Nút Cancel chỉ có lệnh finish().
Quay lại class Main, tại nút Lưu ảnh ta chỉ bật ra class luu và chờ
tên ảnh chuyển về.
Intent in=new
Intent(getBaseContext(),luu.class);
startActivityForResult(in,
1);
Trong hàm Override, ta thêm vào các dòng.
if(resultCode ==
4){
Bundle bun = data.getExtras();
String ve = bun.getString("iz");
String tenanh=ve+".jpg";
Toast.makeText(image.this, "Ảnh đã được lưu", Toast.LENGTH_SHORT).show();
File em =
new File(Environment.getExternalStoragePublicDirectory(
Environment.DIRECTORY_PICTURES),tenanh);
layout.setDrawingCacheEnabled(true);
layout.setDrawingCacheQuality(LinearLayout.DRAWING_CACHE_QUALITY_HIGH);
layout.buildDrawingCache();
Bitmap
b = layout.getDrawingCache();
try {
FileOutputStream fos = new
FileOutputStream(em);
b.compress(CompressFormat.PNG, 100, fos);
fos.flush();
fos.close();
} catch (FileNotFoundException
e) {
e.printStackTrace();
} catch (IOException e)
{
e.printStackTrace();
}
layout.destroyDrawingCache();
}
Ta lấy tên ảnh, thông báo đã lưu, rồi lấy ảnh trong layout chứa 2
cái ảnh chồng nhau lưu vào thư mục Pictures của điện thoại. Xong ta hủy layout
đi để nếu người dùng chụp tiếp nó không bị trùng ảnh cũ.
Chú ý phải xin quyền ghi ngoài trong file AndoidManifest.
Code trong class Main trông như sau.
Ứng dụng sẽ chụp ra ảnh có con ma chồng lên trên ở giữa. Lưu vào
file Pictures của điện thoại hoặc thẻ nhớ.


No comments:
Post a Comment